Introduction to the Microsoft AZ-800 Exam
The Microsoft AZ-800 exam, also known as "Administering Windows Server Hybrid Core Infrastructure," is a critical certification for IT professionals aiming to validate their skills in managing and maintaining hybrid server environments. This exam is designed for those who are responsible for integrating on-premises Windows Server environments with Azure services, ensuring seamless operations across both platforms. As hybrid cloud environments become increasingly prevalent, the demand for skilled professionals who can navigate these complex infrastructures is on the rise.
One of the key components of the AZ-800 exam is understanding and managing Active Directory (AD), a cornerstone of Windows Server environments. Active Directory is a directory service that enables administrators to manage permissions and access to network resources. Among the many features of Active Directory, Distribution Groups play a vital role in facilitating communication within an organization. In this blog, we will delve into the concept of Distribution Groups, how to create and manage them using Active Directory Users and Computers (ADUC), and why mastering these skills is essential for success in the AZ-800 exam.
Definition of Microsoft AZ-800 Exam
The Microsoft AZ-800 exam is part of the Microsoft Certified: Windows Server Hybrid Administrator Associate certification. This exam focuses on the skills required to manage and maintain hybrid server environments, which include both on-premises Windows Server infrastructures and Azure services. The exam covers a wide range of topics, including:
- Implementing and managing hybrid identity
- Managing Windows Server in a hybrid environment
- Implementing and managing hybrid networking
- Managing storage and file services in a hybrid environment
- Securing Windows Server in a hybrid environment
One of the critical areas covered in the AZ-800 exam is Active Directory, which is used to manage users, computers, and other resources within a network. A thorough understanding of Active Directory, including Distribution Groups, is essential for passing the exam and excelling in a hybrid server environment.
Understanding Distribution Groups in Active Directory
Distribution Groups are a fundamental feature of Active Directory that allows administrators to group users, contacts, or other groups for the purpose of sending emails to multiple recipients simultaneously. Unlike Security Groups, which are used to assign permissions to resources, Distribution Groups are primarily used for email distribution. They are commonly used in organizations to facilitate communication among teams, departments, or project groups.
For example, if you have a team of 50 employees working on a project, you can create a Distribution Group that includes all team members. Instead of sending an email to each individual, you can send a single email to the Distribution Group, and it will be delivered to all members of the group. This not only saves time but also ensures that everyone in the group receives the same information.
Distribution Groups can be created and managed using the Active Directory Users and Computers (ADUC) tool, which is a Microsoft Management Console (MMC) snap-in that provides a graphical interface for managing Active Directory objects.
Steps to Create a Distribution Group Using Active Directory Users and Computers (ADUC)
Creating a Distribution Group in Active Directory is a straightforward process that can be accomplished using the ADUC tool. Below are the steps to create a Distribution Group:
Step 1: Open Active Directory Users and Computers (ADUC)
- Log in to your Windows Server with administrative privileges.
- Open the Server Manager by clicking on the Windows icon and selecting Server Manager from the menu.
- In the Server Manager, click on Tools in the top-right corner and select Active Directory Users and Computers from the dropdown menu.
Step 2: Navigate to the Organizational Unit (OU) Where You Want to Create the Distribution Group
- In the ADUC window, navigate to the Organizational Unit (OU) where you want to create the Distribution Group. OUs are containers within Active Directory that hold users, groups, and other objects.
- If you don't have an appropriate OU, you can create one by right-clicking on the domain or an existing OU, selecting New, and then choosing Organizational Unit.
Step 3: Create the Distribution Group
- Right-click on the OU where you want to create the Distribution Group, select New, and then choose Group.
- In the New Object - Group window, enter the following information:
- Group name: Enter a name for the Distribution Group. This name should be descriptive and easily identifiable.
- Group scope: Select the appropriate group scope. For a Distribution Group, you can choose between Global, Universal, or Domain Local. The scope determines the group's visibility and membership.
- Group type: Select Distribution as the group type.
- Click OK to create the Distribution Group.
Step 4: Add Members to the Distribution Group
- After creating the Distribution Group, you need to add members to it. To do this, right-click on the newly created group and select Properties.
- In the Properties window, go to the Members tab and click on the Add button.
- In the Select Users, Contacts, Computers, or Groups window, enter the names of the users, contacts, or groups you want to add to the Distribution Group. You can also use the Advanced button to search for objects in Active Directory.
- Click OK to add the selected members to the Distribution Group.
- Click Apply and then OK to save the changes.
Step 5: Verify the Distribution Group
- To verify that the Distribution Group has been created and populated correctly, you can send a test email to the group's email address (if it has one) or check the group's properties in ADUC.
- Ensure that all intended members have been added and that the group is functioning as expected.
Managing and Maintaining Distribution Groups
Once a Distribution Group has been created, it is essential to manage and maintain it to ensure that it continues to meet the organization's needs. Below are some key tasks involved in managing and maintaining Distribution Groups:
1. Modifying Group Membership
Over time, the membership of a Distribution Group may need to be updated to reflect changes in the organization, such as new hires, departures, or role changes. To modify the membership of a Distribution Group:
- Open ADUC and navigate to the Distribution Group.
- Right-click on the group and select Properties.
- Go to the Members tab and use the Add or Remove buttons to update the group's membership.
- Click Apply and then OK to save the changes.
2. Renaming or Deleting a Distribution Group
If a Distribution Group is no longer needed or needs to be renamed, you can do so using ADUC:
- To rename a group, right-click on the group and select Rename. Enter the new name and press Enter.
- To delete a group, right-click on the group and select Delete. Confirm the deletion when prompted.
3. Configuring Group Properties
Distribution Groups have various properties that can be configured to control their behavior and functionality. Some of the key properties include:
- Email address: If the Distribution Group is used for email distribution, you can configure its email address in the General tab of the group's properties.
- Managed by: You can specify a user or group who is responsible for managing the Distribution Group in the Managed By tab.
- Group type and scope: You can change the group type (Security or Distribution) and scope (Global, Universal, or Domain Local) in the General tab.
4. Monitoring and Troubleshooting
Regularly monitoring the performance and functionality of Distribution Groups is essential to ensure that they are working as intended. Some common issues that may arise include:
- Email delivery issues: If emails sent to the Distribution Group are not being delivered, check the group's email address and ensure that it is correctly configured.
- Membership issues: If some members are not receiving emails, verify that they are correctly added to the group and that their email addresses are valid.
- Group policy conflicts: In some cases, Group Policy settings may conflict with the functionality of Distribution Groups. Ensure that there are no conflicting policies that could affect the group's operation.
Conclusion
Mastering the skills required to create, manage, and maintain Distribution Groups in Active Directory is essential for success in the Microsoft AZ-800 exam. Distribution Groups play a crucial role in facilitating communication within an organization, and understanding how to effectively use them is a key component of managing a hybrid server environment.
By following the steps outlined in this blog, you can confidently create and manage Distribution Groups using Active Directory Users and Computers (ADUC). Additionally, by regularly monitoring and maintaining these groups, you can ensure that they continue to meet the needs of your organization.
As you prepare for the AZ-800 exam, remember that a deep understanding of Active Directory and its features, including Distribution Groups, will not only help you pass the exam but also equip you with the skills needed to excel in a hybrid server environment. Good luck on your journey to becoming a Microsoft Certified: Windows Server Hybrid Administrator Associate!
Special Discount: Offer Valid For Limited Time “AZ-800 Exam” Order Now!
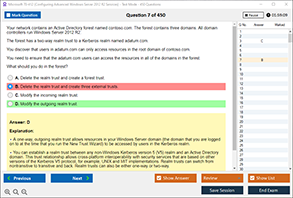
Sample Questions for Microsoft AZ-800 Dumps
Actual exam question from Microsoft AZ-800 Exam.
Which of the following steps is correct for creating a Distribution Group in Active Directory?
A. Open PowerShell, type New-DistributionGroup -Name "SalesTeam", and press Enter.
B. Open Active Directory Users and Computers, right-click the desired OU, select "New," then "Group," and choose "Distribution" as the group type.
C. Use the Command Prompt and type net group SalesTeam /add /domain.
D. Open Group Policy Management, create a new GPO, and link it to the desired OU.