Overview of Layer 2 switches
Layer 2 switches, also known as LAN switches or Ethernet switches, operate at the data link layer of the OSI model. Unlike routers, which connect different networks, Layer 2 switches connect devices within a single network segment.
This allows data to be transmitted between devices on the same network quickly and efficiently. Layer 2 switches use MAC addresses to identify devices on a network. When a device sends data, the switch examines the MAC address of the destination device and forwards the data to the appropriate port. This process is done transparently, so devices on the network are unaware of the presence of the switch.
Layer 2 switches are a critical component of many networks. They provide a cost-effective way to connect multiple devices and improve network performance. By forwarding data only to the intended destination, Layer 2 switches reduce network congestion and improve overall efficiency. They also provide security features, such as port security and VLANs, to help protect networks from unauthorized access.
Difference between Layer 2 and Layer 3 switches
Layer 2 switches and Layer 3 switches are both networking devices that operate at different layers of the OSI model. Layer 2 switches operate at the data link layer, while Layer 3 switches operate at the network layer.
This difference in functionality results in several key differences between the two types of switches.
Layer 2 switches are responsible for forwarding data frames based on MAC addresses. They do not perform any routing functions and are therefore not able to connect different networks. Layer 2 switches are typically used to connect devices within a single network segment, such as a LAN.
Layer 3 switches, on the other hand, are able to perform routing functions. This means that they can connect different networks and forward data packets based on IP addresses. Layer 3 switches are typically used to connect different LANs or to connect a LAN to a WAN.
Here is a table that summarizes the key differences between Layer 2 and Layer 3 switches:
| Feature | Layer 2 Switch | Layer 3 Switch | |---|---|---| | Layer of operation | Data link layer | Network layer | | Functionality | Forwards data frames based on MAC addresses | Forwards data packets based on IP addresses | | Routing capabilities | No | Yes | | Typical use | Connecting devices within a single network segment | Connecting different networks |
Overall, Layer 3 switches offer more functionality than Layer 2 switches. However, Layer 2 switches are typically less expensive and easier to configure. The type of switch that is best for a particular network will depend on the specific requirements of the network.
Why Would a Layer 2 Switch Need an IP Address?
Layer 2 switches typically do not need an IP address. However, there are some cases in which it may be necessary to assign an IP address to a Layer 2 switch. One reason is to allow the switch to be managed remotely. This can be useful for troubleshooting and configuration purposes.
Another reason to assign an IP address to a Layer 2 switch is to allow it to participate in certain network protocols, such as SNMP. SNMP is a protocol that allows network devices to be monitored and managed remotely. By assigning an IP address to the switch, it can be added to an SNMP management system and monitored along with other network devices.
Finally, some Layer 2 switches may have built-in web servers that allow them to be configured and managed through a web browser. In order to access the web server, the switch must have an IP address.
When assigning an IP address to a Layer 2 switch, it is important to use an IP address that is not already in use on the network. The IP address should also be configured on a subnet that is accessible from the management station.
Here are some of the benefits of assigning an IP address to a Layer 2 switch:
- Allows the switch to be managed remotely
- Allows the switch to participate in network protocols, such as SNMP
- Allows the switch to be configured and managed through a web browser
If you are unsure whether or not your Layer 2 switch needs an IP address, it is best to consult the switch's documentation.
For Remote Management
Remote management allows network administrators to manage network devices from a remote location. This can be useful for troubleshooting, configuration, and monitoring purposes. Layer 2 switches can be managed remotely using a variety of methods, including Telnet, SSH, and SNMP.
To manage a Layer 2 switch remotely, the switch must have an IP address. The IP address must be configured on a subnet that is accessible from the management station. Once the IP address has been configured, the switch can be managed using a variety of tools and applications.
Telnet and SSH are two common tools that can be used to manage Layer 2 switches remotely. Telnet is a text-based protocol that allows users to connect to a remote device and execute commands. SSH is a more secure alternative to Telnet that encrypts all traffic between the client and server.
SNMP is a network management protocol that allows network administrators to monitor and manage network devices. SNMP uses a variety of MIBs (Management Information Bases) to store information about the device. This information can be used to troubleshoot problems, configure devices, and monitor performance.
Remote management of Layer 2 switches can provide a number of benefits, including:
- Reduced downtime: Remote management allows administrators to troubleshoot and resolve problems quickly and efficiently, without having to be on-site.
- Improved security: Remote management can help to improve security by allowing administrators to monitor and manage devices from a secure location.
- Increased efficiency: Remote management can help to improve efficiency by allowing administrators to manage multiple devices from a single location.
Overall, remote management of Layer 2 switches can be a valuable tool for network administrators. By using the appropriate tools and techniques, administrators can manage their switches from anywhere in the world, which can save time and improve efficiency.
For VLAN Management
VLANs (Virtual LANs) are a logical way to segment a network into multiple smaller networks. This can be useful for a variety of reasons, such as security, performance, and management. Layer 2 switches can be used to create and manage VLANs.
To create a VLAN, the switch must be configured with the appropriate VLAN ID. The VLAN ID is a number that identifies the VLAN. Once the VLAN has been created, devices can be assigned to the VLAN. This can be done either manually or automatically.
Once devices have been assigned to a VLAN, they will only be able to communicate with other devices on the same VLAN. This can help to improve security by isolating different groups of devices from each other.
VLANs can also be used to improve performance by reducing the amount of broadcast traffic on the network. Broadcast traffic is traffic that is sent to all devices on the network. By isolating different groups of devices into VLANs, the amount of broadcast traffic is reduced, which can improve performance.
Layer 2 switches can be used to manage VLANs in a variety of ways. Some of the most common VLAN management tasks include:
- Creating and deleting VLANs
- Assigning devices to VLANs
- Configuring VLAN trunking
- Monitoring VLAN traffic
By using Layer 2 switches to manage VLANs, network administrators can improve the security, performance, and manageability of their networks.
For SNMP Monitoring
SNMP (Simple Network Management Protocol) is a network management protocol that allows network administrators to monitor and manage network devices. Layer 2 switches can be configured to support SNMP, which allows administrators to monitor a variety of information about the switch, including:
- Interface status
- Traffic statistics
- Errors and discards
- Environmental conditions
SNMP monitoring can be used to troubleshoot problems, identify performance bottlenecks, and plan for future growth. By monitoring Layer 2 switches with SNMP, administrators can gain a better understanding of how their networks are performing and identify any potential problems before they become major issues.
To configure SNMP monitoring on a Layer 2 switch, the administrator must first configure the switch with an IP address. Once the IP address has been configured, the administrator can use an SNMP management software to add the switch to the management system. The SNMP management software will then be able to monitor the switch and collect data about its performance.
There are a variety of SNMP management software products available, both free and commercial. Some of the most popular SNMP management software products include:
- Nagios
- Zabbix
- OpenNMS
- MRTG
- Cacti
Once the SNMP management software has been installed and configured, the administrator can begin monitoring the Layer 2 switch. The SNMP management software will periodically poll the switch for information about its performance. This information can then be viewed in a variety of ways, such as graphs, charts, and tables.
SNMP monitoring can be a valuable tool for network administrators. By monitoring Layer 2 switches with SNMP, administrators can gain a better understanding of how their networks are performing and identify any potential problems before they become major issues.
For Network Time Protocol (NTP)
Network Time Protocol (NTP) is a protocol that is used to synchronize the clocks of computers and other devices on a network. Layer 2 switches can be configured to use NTP to synchronize their clocks with a time server. This can be useful for ensuring that all devices on the network are using the same time, which can be important for applications such as logging and billing.
To configure NTP on a Layer 2 switch, the administrator must first configure the switch with an IP address. Once the IP address has been configured, the administrator can use the switch's configuration interface to specify the IP address of the NTP server. The switch will then periodically send requests to the NTP server to synchronize its clock.
There are a number of different NTP servers available, both public and private. Some of the most popular public NTP servers include:
- pool.ntp.org
- time.google.com
- time.apple.com
Once the NTP server has been configured, the switch will begin synchronizing its clock with the server. The switch will periodically send requests to the server to update its clock. The frequency of these requests can be configured by the administrator.
By using NTP to synchronize their clocks, Layer 2 switches can ensure that all devices on the network are using the same time. This can be important for applications such as logging and billing, which rely on accurate timekeeping.
For Syslog and Logging
Syslog is a protocol that is used to send log messages from devices on a network to a central server. Layer 2 switches can be configured to send syslog messages to a syslog server. This can be useful for troubleshooting and monitoring purposes.
To configure syslog on a Layer 2 switch, the administrator must first configure the switch with an IP address. Once the IP address has been configured, the administrator can use the switch's configuration interface to specify the IP address of the syslog server. The switch will then send syslog messages to the server whenever an event occurs on the switch.
There are a number of different syslog servers available, both free and commercial. Some of the most popular syslog servers include:
- Kiwi Syslog Server
- SolarWinds Log & Event Manager
- Papertrail
- Graylog
- Splunk
Once the syslog server has been configured, the switch will begin sending syslog messages to the server. The syslog messages will contain information about the event that occurred on the switch, such as the time of the event, the severity of the event, and the source of the event.
By sending syslog messages to a central server, Layer 2 switches can help administrators to troubleshoot and monitor their networks. Syslog messages can be used to identify problems with the switch, track user activity, and monitor security events.
For Firmware and Configuration Updates
Firmware and configuration updates are essential for keeping Layer 2 switches running smoothly and securely. Firmware updates address bugs and security vulnerabilities in the switch's operating system, while configuration updates allow administrators to make changes to the switch's settings.
There are two main ways to update the firmware and configuration on a Layer 2 switch: through the switch's web interface or through a command-line interface (CLI). The web interface is typically easier to use for administrators who are not familiar with the CLI.
To update the firmware on a Layer 2 switch through the web interface, the administrator must first download the firmware file from the switch manufacturer's website. Once the firmware file has been downloaded, the administrator can log in to the switch's web interface and navigate to the firmware update page. The administrator can then select the firmware file and click the update button.
To update the configuration on a Layer 2 switch through the web interface, the administrator must first log in to the switch's web interface and navigate to the configuration page. The administrator can then make the necessary changes to the switch's configuration and click the save button.
To update the firmware and configuration on a Layer 2 switch through the CLI, the administrator must first connect to the switch using a terminal program. Once the administrator is connected to the switch, they can use the following commands to update the firmware and configuration:
copy tftp flash
config-register 0x2102
The administrator should then follow the prompts to update the firmware and configuration.
By keeping the firmware and configuration on their Layer 2 switches up to date, administrators can help to ensure that their switches are running smoothly and securely.
How to Assign an IP Address to a Layer 2 Switch
Assigning an IP address to a Layer 2 switch is a simple process that can be completed in a few steps. Here are the steps on how to assign an IP address to a Layer 2 switch:
1. Connect to the switch's web interface. To do this, open a web browser and enter the switch's IP address into the address bar. The default IP address for most Layer 2 switches is 192.168.1.1.
2. Log in to the switch's web interface. Enter the switch's username and password into the login form. The default username and password for most Layer 2 switches are "admin" and "password."
3. Navigate to the IP configuration page. The location of this page may vary depending on the switch's web interface. However, it is typically located under the "Network" or "Management" menu.
4. Enter the IP address, subnet mask, and default gateway. Enter the IP address that you want to assign to the switch into the "IP Address" field. Enter the subnet mask for the switch's network into the "Subnet Mask" field. Enter the default gateway for the switch's network into the "Default Gateway" field.
5. Click the "Save" button. The switch will save the new IP configuration and reboot.
Once the switch has rebooted, it will be assigned the new IP address. You can now use the new IP address to manage the switch remotely.
Here are some additional tips for assigning an IP address to a Layer 2 switch:
- Make sure that the IP address that you assign to the switch is not already in use on the network.
- Use a subnet mask that is appropriate for the size of your network.
- Enter the correct default gateway for your network.
Exam Relevance – Cisco 200-301
The topics covered in this outline are highly relevant to the Cisco 200-301 exam. The 200-301 exam is one of the exams required for the Cisco Certified Network Associate ( CCNA) certification. The CCNA certification is a foundational certification for network engineers and administrators.
The 200-301 exam covers a wide range of topics, including:
- Network fundamentals
- LAN switching technologies
- Routing technologies
- WAN technologies
- Infrastructure services
- Security fundamentals
The topics covered in this outline are essential for understanding the concepts tested on the 200-301 exam. By studying these topics, you can improve your chances of passing the exam and earning your CCNA certification.
Here are some specific examples of how the topics covered in this outline are relevant to the 200-301 exam:
- Layer 2 switches: Layer 2 switches are covered in the LAN switching technologies section of the 200-301 exam. You need to understand how Layer 2 switches work in order to configure and troubleshoot them.
- VLANs: VLANs are covered in the LAN switching technologies section of the 200-301 exam. You need to understand how to create and manage VLANs in order to segment your network and improve security.
- SNMP: SNMP is covered in the infrastructure services section of the 200-301 exam. You need to understand how to use SNMP to monitor and manage your network devices.
- Syslog: Syslog is covered in the infrastructure services section of the 200-301 exam. You need to understand how to use syslog to collect and analyze log messages from your network devices.
By studying the topics covered in this outline, you can prepare for the Cisco 200-301 exam and earn your CCNA certification.
Final exam preparation tips
As you prepare for your final exam, it is important to develop a study plan and stick to it. Here are some tips to help you prepare for your final exam:
- Start studying early. Don't wait until the last minute to start studying. Give yourself plenty of time to review the material and practice answering questions.
- Create a study schedule. Set aside specific times each day to study. Stick to your schedule as much as possible.
- Review your class notes. Your class notes are a valuable resource for studying. Review your notes regularly to reinforce the concepts you have learned.
- Read the textbook. The textbook is another important resource for studying. Make sure to read the assigned chapters and take notes on the key concepts.
- Practice answering questions. One of the best ways to prepare for your final exam is to practice answering questions. You can find practice questions in your textbook, online, or from your professor.
- Take practice exams. Taking practice exams can help you to identify your strengths and weaknesses. It can also help you to get used to the format of the final exam.
- Get a good night's sleep before the exam. It is important to get a good night's sleep before your final exam. This will help you to be alert and focused on the day of the exam.
- Eat a healthy breakfast on the day of the exam. Eating a healthy breakfast will help you to stay energized and focused during the exam.
- Arrive at the exam on time. Give yourself plenty of time to get to the exam room and settle in.
- Read the instructions carefully. Before you start the exam, read the instructions carefully. Make sure you understand what is expected of you.
- Answer the questions to the best of your ability. Don't panic if you don't know the answer to a question. Just do your best to answer it to the best of your ability.
- Check your work. Once you have finished the exam, check your work carefully. Make sure you have answered all of the questions and that your answers are correct.
By following these tips, you can prepare for your final exam and achieve your best possible score.
Special Discount: Offer Valid For Limited Time “200-301 Exam” Order Now!
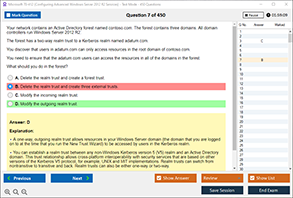
Sample Questions for Cisco 200-301 Dumps
Actual exam question from Cisco 200-301 Exam.
What are two functions of a Layer 2 switch? (Choose two.)
A. acts as a central point for association and authentication servers
B. selects the best route between networks on a WAN
C. moves packets within a VLAN
D. moves packets between different VLANs
E. makes forwarding decisions based on the MAC address of a packet